Tuesday, October 2, 2018

Cowboy/Cowgirl Baby Quilt
Someone donated these fabric scraps to Trail Ridge Quilters in Estes Park, Colorado and I made a baby quilt.  Believe me, there was nothing left when I finished - just 2 cowboys and 2 cowgirls.   The design is simple 9 patch blocks with fussy cut centers for the cowboy/cowgirl blocks.  Trail Ridge Quilters is a group of ladies who make quilted items and sell them, with all proceeds going to the Health Center Foundation.  The Health Center allows the group to store their merchandise, fabric and tools in a closet near the room where they meet every Tuesday afternoon.  


Flower Garden Quilt

I made this quilt from a Thimbleberries design called "Flower Garden" several years ago when we lived in our 100 year old house on Maine Street in Enid, Oklahoma.  The colors coordinated with the stenciled walls of the master bedroom.  However, because of its size, I was afraid to quilt it and just left it.  

Jump forward three houses and the colors work great in our log home in Estes Park, Colorado, so I quilted it.  Originally, it was designed as a queen size with a pillow tuck.  By turning it 90 degrees, and not tucking much into the footboard, it now rests on our king size bed. (I found the cranberry colored pillow shams at Wal-Mart.)
Stencil Club Voices
I was thrilled to be asked to join Stencil Girl's Stencil Club Voices in September and October.  They sent me the stencils in advance and asked me to create something with them.  The first set was called "Caves and Ladders."  The large stencil was a well, but I saw a basket, so I made this Bible journaling spread about baby Moses' being rescued by pharoah's daughter from the basket his mother had made. 
In addition to the September club large stencil, I used some designed by Carolyn Dube for the reeds and title.  All stencils are available from the Stencil Girl website.

After applying two coats of clear gesso to the pages, I used Distress Oxide inks for the background and stenciling.  

Come back in a few weeks to see what I did with the October club stencils.

Monday, August 27, 2018

Bear Tracks

 I love blue and white (not cream) quilts and this is no exception.  It's a pattern from Angela Walters (Midnight Quilt Show) called Bear Tracks.  It works up quickly.  I used 12 of my own fat quarters and the rest came from the closet of Trail Ridge Quilters in Estes Park.  There are four different white-on-white prints used for the background and a light blue on white print for the backing.  Even the batting came from the closet.  (People donate items to the group all the time.)  The second photo shows a new to me quilt pattern that also works up very quickly.  This quilt will be available to purchase at the group's next sale.  All proceeds go to the Estes Park Medical Center Foundation.

Friday, April 20, 2018


Everyday Tintables Card Pack Cards
Concord and 9th sent me a free set of these card fronts.  The are basically debossed watercolor paper - the paper around the dots and "just a note" sentiment is higher and catches the ink while the sentiment and dots remain white.   Here's two of the four types of card fronts, which I cut down from the original 6"x6" size.  

I inked the dots panel with Distress Oxide inks in pinks and purples, then wiped it with a baby wipe to clean off the dots and blend the inks.  Since I didn't have a matching top folding note card, I inked the left and right edges of a white card with distress oxide ink to match the center panel.  I used the same color ink for the "enjoy it all" sentiment (by Concord and 9th) which I embossed with clear embossing powder on a piece of vellum.  I wrapped the vellum around the panel and mounted it on fun foam before attaching to the card base.  The strip sentiment is from the same stamp set, stamped with the same distress oxide ink and embossed with clear embossing powder.  I mounted the strip to the card front with foam tape to add some dimension.  The flower and flower center are from my stash.

The lower card was covered with Blueprint Sketch Distress Oxide ink.  Using the Sketched Stripe Background stamp by Concord and 9th, I stamped the stripes using Jennifer McGuire's Layered Oxide Stamping technique and Squeezed Lemonade Distress Oxide ink.  I misted some water over the panel and let it oxidize.  After drying, I cut the panel into a banner shape and tied baker's twine around the top.  I added fun foam behind the banner before attaching it to the green note card from Michaels.  The flower was from my stash and I used Ivory Nuvo Drops for the flower center.

I have more examples of cards from the Everyday Tintables Card Pack coming up in future posts.

Faux Inlay Celebrate You Card
Here's another faux inlay card using Jennifer McGuire's technique.  I used an alcohol colored piece of cardstock which has Micro Glaze on it for some shine.  I attached the die-cut panel to a white notecard.  The "celebrate YOU" dies are made by Concord and 9th.  The "YOU" is cut from blue cardstock and I added some shimmer with a Nuvo glitter pen.  The shadow is cut from vellum. I added some Dew Drops for added dimension.  The would be a great masculine card for birthdays or congratulations.

Thursday, April 19, 2018

Faux Inlay Hello Card


Faux Inlay Hello Card
Jennifer McGuire's video "Easy Die Cut Inlay" inspired this card.  I used dies from Tonic's Sunburst Gazania set to cut the background from an alcohol colored piece of cardstock with Micro Glaze to give it a sheen.  This background piece is attached to a piece of fun foam, then attached to a yellow notecard from Michaels.  I used Concord and 9th's Hello die to cut the large sentiment from matching colors of cardstock and adhered it to the center of the card front.  The lower sentiment is from The Pink Stamper.  I used Versacolor ink with clear embossing powder to stamp the sentiment on matching cardstock and attached it to the card front with foam tape.  I added some Dew Drops for embellishments.
Heart and Daisy Notecard
This card is somewhat out of my comfort zone since it has a black background.  First, I stamped the flower image (Hearts and Swirls by Dare 2B Artzy) on the black cardstock, using Versafine ink and clear embossing powder.  I also stamped the image on scrap white cardstock, using the same ink and embossing powder. I added Distress Oxide inks to the center of the black panel with an ink blending tool - sorry I don't remember which colors I used.  The heart, flowers and leaves were colored with watercolor pencils and blended with a water pen.  Then I fussy cut out the heart, daisies and leaves and glued it over the stamped image on the card.  Lastly, I attached the black panel to a white notecard.  I like the way the image really stands out against the dark background.

Life is Better Mandala Card
This card uses the negative space from the card in the previous post.  It's a piece of cardstock colored with alcohol inks, with Micro Glaze on top to protect the colors and give a little sheen.  I used Versacolor inks, clear embossing powder and the Many Mandalas stamp set (by Concord and 9th) to make the mandala inside the diecut space.  "Life is better" is in the Many Mandalas set and I used Versafine ink and clear embossing powder to make it stand out.  "With somebody you love" is also in the Many Mandalas stamp set.  I used Versamark ink and white embossing powder on black cardstock and attached the sentiment to the card with foam tape.  I added dots with Ivory Nuvo Drops to the black cardstock, and pink glitter Nuvo Drops to the mandala for embellishments. I like getting two cards from one background piece.
A Wonderful Day Card
This card uses the Many Mandalas stamps and dies from Concord and 9th.  I stamped and embossed with white embossing powder on a panel I made using alcohol inks on cardstock, using ideas from Jennifer McGuire's "Alcohol Ink Details" video.  I die cut the mandala and the white center using the coordinating dies and trimmed the lower sentiment to fit the card. I stamped the sentiment on the small center using a pink ink from Versacolor and embossed it with clear embossing powder. Then I attached it to the larger mandala with foam tape.  I attached that unit to the front of a white notecard and placed the lower sentiment strip at the bottom of the notecard.  Finally, I used pink glitter Nuvo drops to add some embellishment to the card.
Stamped Distress Oxide Background Thank You Card
Here's another card using Jennifer McGuire's "Layered Oxide Stamping" method for the beautiful background.  Here's how I did it:  first I covered a white panel with Blueprint Sketch Distress Oxide Ink - I just smoosh the ink pad onto the panel until it's covered.  Then I dried it with a heat gun.  Next I positioned it in my Misti so the Arabesque Medallion stamp (from Altenew) is centered over the panel.  I inked the stamp with Squeezed Lemonade Distress Oxide ink, lightly misted it with water and made the image.  (By letting the stamp rest on the background a little longer than normal, more of the wet ink will react with the background ink).  Then I inked the stamp with more Squeezed Lemonade and stamped again to make the color a little brighter.  I diecut a circle from light green cardstock.  I inked a scrap of white cardstock with Blueprint Sketch Distress Oxide ink, dried it and diecut the "thank you" sentiment (made by Tonic) from it.  The sentiment was glued to the circle and the circle attached to the card with foam tape to give some dimension.   The blue panel was attached to fun foam before I attached it to a light green notecard from Michaels.  Finally, I used Apple Green Nuvo drops for a little embellishment. I love this background technique and wish I had more pretty background stamps to make more cards.
Watercolor Daisy Notecard
This card uses the same technique as the last post, but I used a solid stamp.  I'll admit this card took several tries to get just the right amount of water, but the final results really look like watercolor.  First, I colored the stamp with Distress Markers, then misted with water before stamping the image.  I used regular cardstock, but watercolor paper would work too.  After it dried, I tied the yellow jute around the panel, then attached it to a yellow notecard from Michaels.  
Field of Flowers Watercolor Notecard
This cute notecard uses a discontinued Stampendous stamp and Distress Markers.  I colored the stamp with the markers and lightly misted the stamp with water before stamping the image.  It's that simple to get a watercolor look.  I mounted the white panel on fun foam, tied the pink jute around it, then attached the unit to a pink notecard from Michaels.  The next post  uses the same technique, but with a different type of stamp.

Wednesday, April 18, 2018

Yay Birthday Card with Alcohol Ink Background
I thought this would be a good card to give a guy, with the dark brown background made with alcohol inks on Yupo paper.  The lower border is cut with a die from Concord and 9th's "Select-a-Size Border Dies" set.  The large Yay sentiment is from My Favorite Things "So Many Yays" die set.  I embossed the die (with copper embossing powder) about three times to get it nice and smooth.  The bottom sentiment is also embossed with copper embossing powder.  The stamp is from My Favorite Things "Yay for You" stamp set that coordinates with the Yay die set.  I added some Dew Drops as a finishing touch.  This is a top folding 4.25" x 5.5" inch card.
Happy Alcohol Ink Background Card
A couple weeks ago I made lots of card backgrounds using ideas from Jennifer McGuire's "Alcohol Ink Details" video.  It was SO much fun and I made SO many card backgrounds that you will see in upcoming posts.  This background is on regular white cardstock, sealed with Micro Glaze.  I really don't know what ink colors I used - sorry.  The happy die set is from Honey Bee Stamps.  

Tuesday, June 6, 2017

Easel Cards

A couple months ago I put together this collection of cards for a class at Paper Arts, 632 W. Edmond Road in Edmond, Oklahoma.  Thought I would share them with you - they are available for purchase at the store.  All the stamps are by  Stampendous.  
 Watercolor pencils are my coloring medium of choice - I think they
are the easiest to blend.
 All these images were stamped with Onyx Black Versafine and embossed with WOW clear embossing powder.  The raised lines helps to keep the water confined when blending.


Embossed Stenciled Card

I'm back from a quick visit to our home in Estes Park with my younger son.  He rode his motorcycle and played a video game while I caught up on my scrapbooking.  Now it's back to editing the video I made before I left and making this accompanying blog post.  Since I'm still learning how to edit a video, the sound is a little rough in spots and I don't know how to fix it.  Being an impatient person, I went ahead a posted the video, anyway, so I can get on to the fun part - making another video.  But first, I need to finish this blog post.  Here's the link to the video:

https://www.youtube.com/watch?v=QOvAUkKtVig&t=1s


The front of this card is supposed to resemble aged wallpaper. 


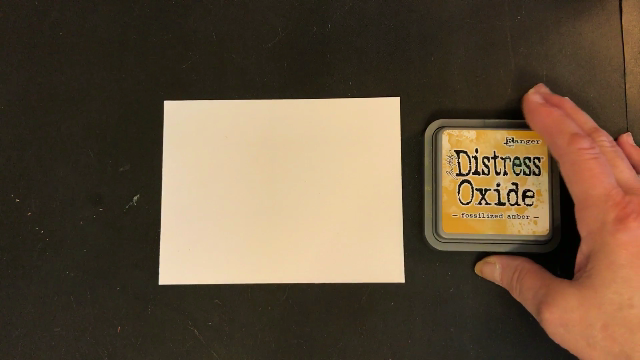
Use Fossilized Amber Distress Oxide Ink for the background by pressing the ink onto my work surface and spraying the ink with water.


Then "smoosh" a 5.5" x 4.25" piece of white card stock through the ink.  Use a heat tool to dry the panel while spraying it from above with more water, to give it a speckled look.


Use a paintbrush and more water to add larger droplets to the card and dry it again.


Use Kaisercraft's 12 x 12 Mini Mix Stencil to add the fleur-de-lis pattern to the panel. 


After lining up the panel with the corner of the stencil, use Orange Marmalade Distress Oxide Ink and a Distress Applicator tool to color in the centers of each fleur-de-lis pattern.


Use Fired Brick Distress Oxide Ink to color in the edges of each fleur-de-lis pattern,blending into the Orange Marmalade sections.


Because the stencil is smaller than the cardstock panel, move the stencil, lining up with the previously stenciled sections, to finish the front.


Next spray the panel with more water and driy it with a heat tool.  This final spray will allow the stenciled design to blend into the Fossilized Amber background just a little bit, giving the panel a more aged look.


Now for the embossed part - insert the panel into Kaisercraft's Tiny Roses embossing folder and run through a die cutting machine. 


This will give a subtle texture to the panel.


From white card stock, cut a decorative border using Our Daily Bread's Art Deco border die.


 Ink the center of the border with Orange Marmalade Distress Oxide ink.


Ink the outside edges of the border with Fired Brick Distress Oxide Ink. 


From white card stock, cut the sentiment using Our Daily Bread's Faith border die. 


Also cut a strip of white card stock to the same width as the line under the word Faith.


Ink the Faith border and thin strip of card stock with Fired Brick Distress Oxide Ink.  


Weave a piece of 1/8" wide satin ribbon through the lacy Art Deco Border. 


Attach the border to the front of the panel, about 3/8" from the bottom, using small dots of Nuvo Deluxe Adhesive.


Attach the Faith border above the Art Deco border and the inked strip below the border, using Nuvo Deluxe Adhesive.


Flip the panel over and attach the ribbon ends to the back of the panel using small pieces
of Scor-tape.


Trim off the ends of the inked card stock strip, even with the panel.


Attach the panel to the front of a white card base with Scor-tape.


Use a Craft-deebowz maker to tie two identical bows from the 1/8" wide ribbon.


Instructions for using the bow maker and included in the packaging.  If you tie a square knot, you can use this fantastic tool.


Once tied, these bows will not come undone.


Use Nuvo Deluxe Adhesive to attach the bows to the Art Deco border.


Your beautiful card is ready to send to a friend.


Visit Paper Arts, 632 W. Edmond Road, Edmond, Oklahoma for all your crafting needs.


Follow the store on Facebook for all the latest news about new products and classes.